Rancher 2: Node & Vue on Kubernetes, Docker self-hosted CaaS


This is a tutorial of our Node / Vue full-stack running on a Kubernetes cluster with Rancher. As an extension of the previous article where we wanted to manage scalability with Docker Swarm and CapRover, here we are going to test something more advanced with Kubernetes & Rancher, but easily with RKE.
Of course, you can, according to your needs, use our stacks simply behind a reverse proxy, traeffik, or a simple pm2 cluster. But the objective of weareopensource remains to facilitate the gap of an idea when it goes into production. Who says production, necessarily says scalability and resilience. It is in this idea that we offer this kind of example.
Kubernetes: Kubernetes (K8s) is an open-source system for automating deployment, scaling, and management of containerized applications. It groups containers that make up an application into logical units for easy management and discovery
Rancher: Rancher is a complete software stack for teams adopting containers. It addresses the operational and security challenges of managing multiple Kubernetes clusters, while providing DevOps teams with integrated tools for running containerized workloads.
rke: Rancher Kubernetes Engine solves the problem of installation complexity, a common issue in the Kubernetes community. It's a CNCF-certified Kubernetes distribution that runs entirely within Docker containers.
helm: Helm helps you manage Kubernetes applications — Helm Charts help you define, install, and upgrade even the most complex Kubernetes application.
Prerequisite
- One server, at least 4GB of memory (in this example fresh Debian 10)
- Docker set on the server and our computer
- SSH key set from computer to server
- Docker enabled for users (install example available here)
- Server Firewalld or iptables
# Firewalld

# ssh http https must be open
sudo firewall-cmd --add-service={ssh, http,https} --permanent --zone=public


firewall-cmd --permanent --add-port=2376/tcp
firewall-cmd --permanent --add-port=2379/tcp
firewall-cmd --permanent --add-port=2380/tcp
firewall-cmd --permanent --add-port=6443/tcp
firewall-cmd --permanent --add-port=8472/udp
firewall-cmd --permanent --add-port=9099/tcp
firewall-cmd --permanent --add-port=10250/tcp
firewall-cmd --permanent --add-port=10254/tcp
firewall-cmd --permanent --add-port=30000-32767/tcp
firewall-cmd --permanent --add-port=30000-32767/udp

# iptables

iptables -t filter -A INPUT -p tcp --dport 6643 -j ACCEPT
iptables -t filter -A INPUT -p tcp --dport 2376 -j ACCEPT
iptables -t filter -A INPUT -p tcp --dport 2379 -j ACCEPT
iptables -t filter -A INPUT -p tcp --dport 2380 -j ACCEPT
iptables -t filter -A INPUT -p tcp --dport 8472 -j ACCEPT
iptables -t filter -A INPUT -p tcp --dport 9099 -j ACCEPT
iptables -t filter -A INPUT -p tcp --dport 10250 -j ACCEPT
iptables -t filter -A INPUT -p tcp --dport 10254 -j ACCEPT

iptables -t filter -A INPUT -p tcp --match multiport --dports 30000:32767 -j ACCEPT
iptables -t filter -A INPUT -p udp --match multiport --dports 30000:32767 -j ACCEPT

iptables -t filter -A OUTPUT -p tcp --dport 6643 -j ACCEPT
iptables -t filter -A OUTPUT -p tcp --dport 2379 -j ACCEPT
iptables -t filter -A OUTPUT -p tcp --dport 2380 -j ACCEPT
iptables -t filter -A OUTPUT -p tcp --dport 8472 -j ACCEPT
iptables -t filter -A OUTPUT -p tcp --dport 9099 -j ACCEPT
iptables -t filter -A OUTPUT -p tcp --dport 10250 -j ACCEPT
iptables -t filter -A OUTPUT -p tcp --dport 10254 -j ACCEPT
warning : if you are on debian 10, switch to legacy iptables
update-alternatives --set iptables /usr/sbin/iptables-legacy
update-alternatives --set ip6tables /usr/sbin/ip6tables-legacy
Install kubectl
curl -LO https://storage.googleapis.com/kubernetes-release/release/`curl -s https://storage.googleapis.com/kubernetes-release/release/stable.txt`/bin/linux/amd64/kubectl
chmod +x ./kubectl
sudo mv ./kubectl /usr/local/bin/kubectl
kubectl version --client


# with brew
brew install kubectl
kubectl version –client
Install RKE
wget -O rke https://github.com/rancher/rke/releases/download/v1.0.8/rke_linux-amd64
chmod +x rke
sudo mv rke /usr/local/bin

# with brew
brew install rke
Install Helm (usefull for next articles & lot of tuto)
curl https://raw.githubusercontent.com/helm/helm/master/scripts/get-helm-3 | bash

# with brew
brew install helm
Cluster init
All the necessary tools are installed, we will now provision our cluster
init configuration with RKE
The configuration file allowing RKE to generate the cluster. It will be generated by answering a set of questions.
There are three types of host in a Kubernetes cluster:
Nodes with the etcd role run etcd, which is a consistent and highly available key value store used as Kubernetes’ backing store for all cluster data. etcd replicates the data to each node.Nodes with thecontrolplanerole run the Kubernetes master components (excludingetcd, as it’s a separate role). See Kubernetes: MasterComponents for a detailed list of components.
Nodes with the worker role run the Kubernetes node components. See Kubernetes: Node Components for a detailed list of components.So we're just going to make sure that all three hosts are deployed to our server. The rest will remain as default for the moment. The generated configuration file can always be edited afterward, notably to add nodes or other things ...
# Our computer
mkdir mycluster
cd mycluster
rke config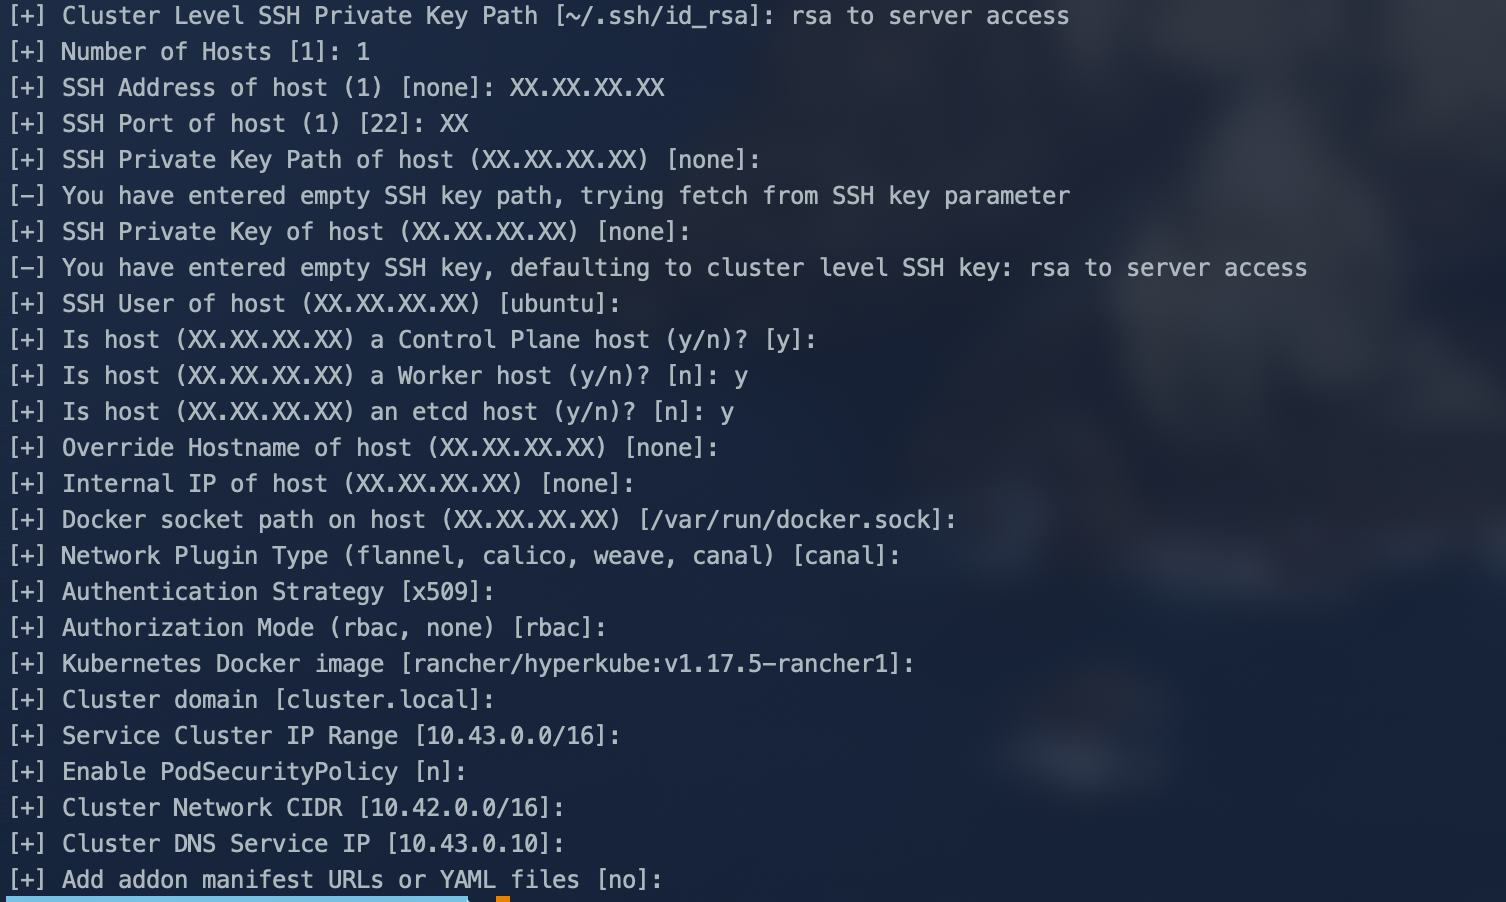
Fyi : architecture recommendation for real production :
worker(theworkerrole should not be used or added on nodes with theetcdorcontrolplanerole)
Have at least three nodes with the role etcd to survive losing one node. Increase this count for higher node fault toleration, and spread them across (availability) zones to provide even better fault tolerance.Assign two or more nodes the controlplane role for master component high availability.Assign two or more nodes the worker role for workload rescheduling upon node failure.
By default a configuration file cluster.yml was created at the place where you executed the command, something like this :
# If you intened to deploy Kubernetes in an air-gapped environment,
# please consult the documentation on how to configure custom RKE images.
nodes:
- address: XX.XX.XX.XX
  port: XX
  internal_address: ""
  role:
  - controlplane
  - worker
  - etcd
  hostname_override: ""
  user: ubuntu
  docker_socket: /var/run/docker.sock
  ssh_key: ""
  ssh_key_path: rsa to server access
  ssh_cert: ""
  ssh_cert_path: ""
  labels: {}
  taints: []
services:
  etcd:
    image: ""
    extra_args: {}
    extra_binds: []
    extra_env: []
    external_urls: []
    ca_cert: ""
    cert: ""
    key: ""
    path: ""
    uid: 0
    gid: 0
    snapshot: null
    retention: ""
    creation: ""
    backup_config: null
  kube-api:
    image: ""
    extra_args: {}
    extra_binds: []
    extra_env: []
    service_cluster_ip_range: 10.43.0.0/16
    service_node_port_range: ""
    pod_security_policy: false
    always_pull_images: false
    secrets_encryption_config: null
    audit_log: null
    admission_configuration: null
    event_rate_limit: null
  kube-controller:
    image: ""
    extra_args: {}
    extra_binds: []
    extra_env: []
    cluster_cidr: 10.42.0.0/16
    service_cluster_ip_range: 10.43.0.0/16
  scheduler:
    image: ""
    extra_args: {}
    extra_binds: []
    extra_env: []
  kubelet:
    image: ""
    extra_args: {}
    extra_binds: []
    extra_env: []
    cluster_domain: cluster.local
    infra_container_image: ""
    cluster_dns_server: 10.43.0.10
    fail_swap_on: false
    generate_serving_certificate: false
  kubeproxy:
    image: ""
    extra_args: {}
    extra_binds: []
    extra_env: []
network:
  plugin: canal
  options: {}
  mtu: 0
  node_selector: {}
  update_strategy: null
authentication:
  strategy: x509
  sans: []
  webhook: null
addons: ""
addons_include: []
system_images:
  etcd: rancher/coreos-etcd:v3.4.3-rancher1
  alpine: rancher/rke-tools:v0.1.56
  nginx_proxy: rancher/rke-tools:v0.1.56
  cert_downloader: rancher/rke-tools:v0.1.56
  kubernetes_services_sidecar: rancher/rke-tools:v0.1.56
  kubedns: rancher/k8s-dns-kube-dns:1.15.0
  dnsmasq: rancher/k8s-dns-dnsmasq-nanny:1.15.0
  kubedns_sidecar: rancher/k8s-dns-sidecar:1.15.0
  kubedns_autoscaler: rancher/cluster-proportional-autoscaler:1.7.1
  coredns: rancher/coredns-coredns:1.6.5
  coredns_autoscaler: rancher/cluster-proportional-autoscaler:1.7.1
  nodelocal: rancher/k8s-dns-node-cache:1.15.7
  kubernetes: rancher/hyperkube:v1.17.5-rancher1
  flannel: rancher/coreos-flannel:v0.11.0-rancher1
  flannel_cni: rancher/flannel-cni:v0.3.0-rancher5
  calico_node: rancher/calico-node:v3.13.0
  calico_cni: rancher/calico-cni:v3.13.0
  calico_controllers: rancher/calico-kube-controllers:v3.13.0
  calico_ctl: rancher/calico-ctl:v2.0.0
  calico_flexvol: rancher/calico-pod2daemon-flexvol:v3.13.0
  canal_node: rancher/calico-node:v3.13.0
  canal_cni: rancher/calico-cni:v3.13.0
  canal_flannel: rancher/coreos-flannel:v0.11.0
  canal_flexvol: rancher/calico-pod2daemon-flexvol:v3.13.0
  weave_node: weaveworks/weave-kube:2.5.2
  weave_cni: weaveworks/weave-npc:2.5.2
  pod_infra_container: rancher/pause:3.1
  ingress: rancher/nginx-ingress-controller:nginx-0.25.1-rancher1
  ingress_backend: rancher/nginx-ingress-controller-defaultbackend:1.5-rancher1
  metrics_server: rancher/metrics-server:v0.3.6
  windows_pod_infra_container: rancher/kubelet-pause:v0.1.3
ssh_key_path: rsa to server access
ssh_cert_path: ""
ssh_agent_auth: false
authorization:
  mode: rbac
  options: {}
ignore_docker_version: false
kubernetes_version: ""
private_registries: []
ingress:
  provider: ""
  options: {}
  node_selector: {}
  extra_args: {}
  dns_policy: ""
  extra_envs: []
  extra_volumes: []
  extra_volume_mounts: []
  update_strategy: null
cluster_name: ""
cloud_provider:
  name: ""
prefix_path: ""
addon_job_timeout: 0
bastion_host:
  address: ""
  port: ""
  user: ""
  ssh_key: ""
  ssh_key_path: ""
  ssh_cert: ""
  ssh_cert_path: ""
monitoring:
  provider: ""
  options: {}
  node_selector: {}
  update_strategy: null
  replicas: null
restore:
  restore: false
  snapshot_name: ""
dns: null
If everything is ok with firewall and ssh configuration between your machine and the server you can start the implementation of the cluster.
Cluster installation
cluster Up !
rke up
# rke remove to delete
Well done, you have just deployed a Kubernetes cluster on your server :)
Install Rancher on the cluster
you can choose between 3 ssl configuration, in this example we use Let's Encrypt
# add
helm repo add rancher-latest https://releases.rancher.com/server-charts/latest
kubectl create namespace cattle-system
helm install rancher rancher-latest/rancher \
  --namespace cattle-system \
  --set hostname=rancher.my.org \
  --set ingress.tls.source=letsEncrypt \
  --set letsEncrypt.email=yourmail@example.com
After a few minutes, you should be able to access the rancher on the port of your machine. You just have to add an entry A from your NDD to the IP address, something like rancher.domain.com, and create your administrator account during the first connection.
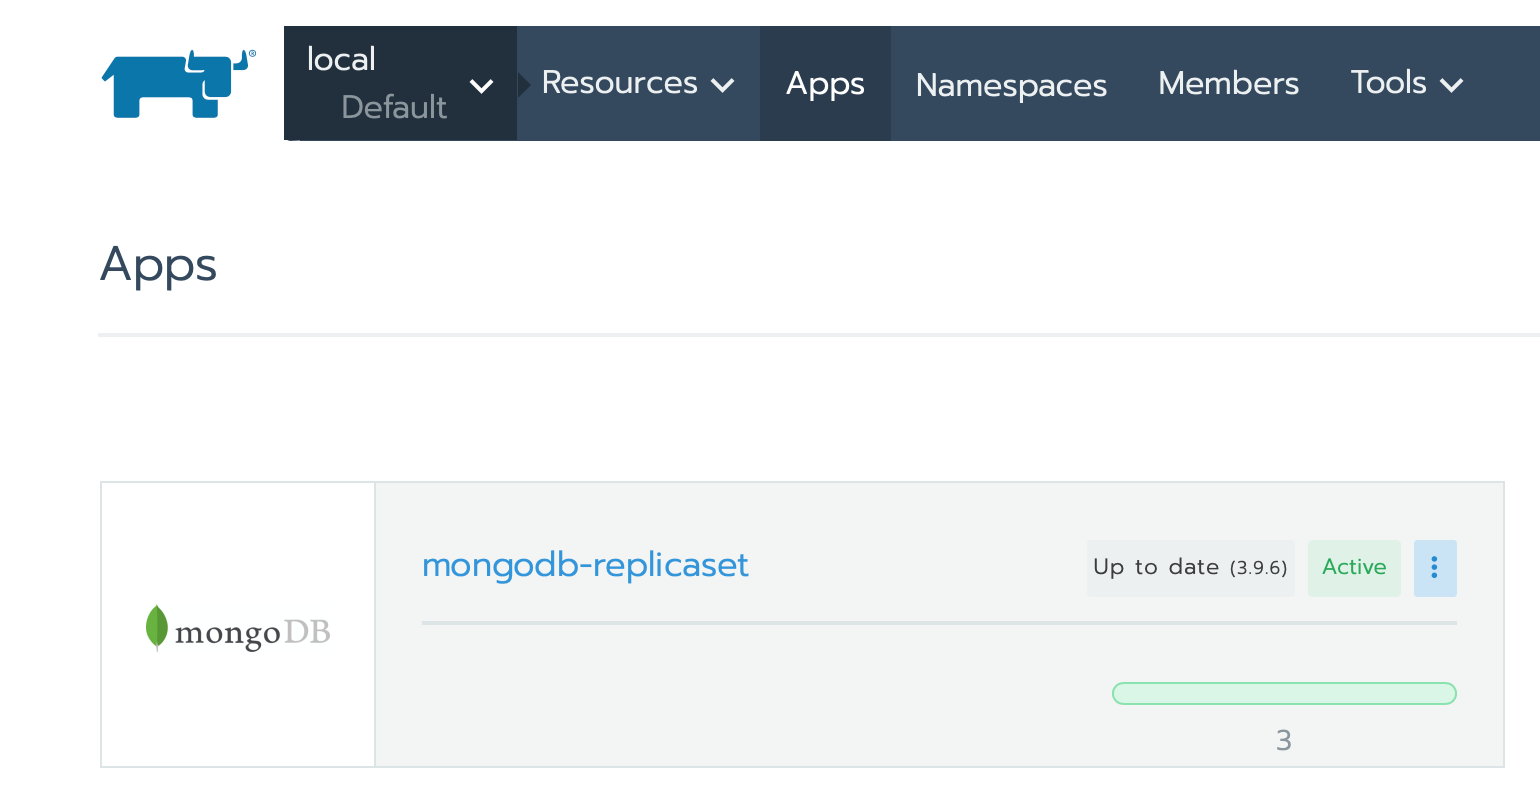
Mongo
We will begin by up our cluster mongodb via rancher interface. A concept of rancher is the namespace, we suggest a namespace per project in order to then deliver all of your images for a given project in this namespace. As mongo can be used from different namespace, here we will deliver it in the namespace default. It will be accessible from all the others.
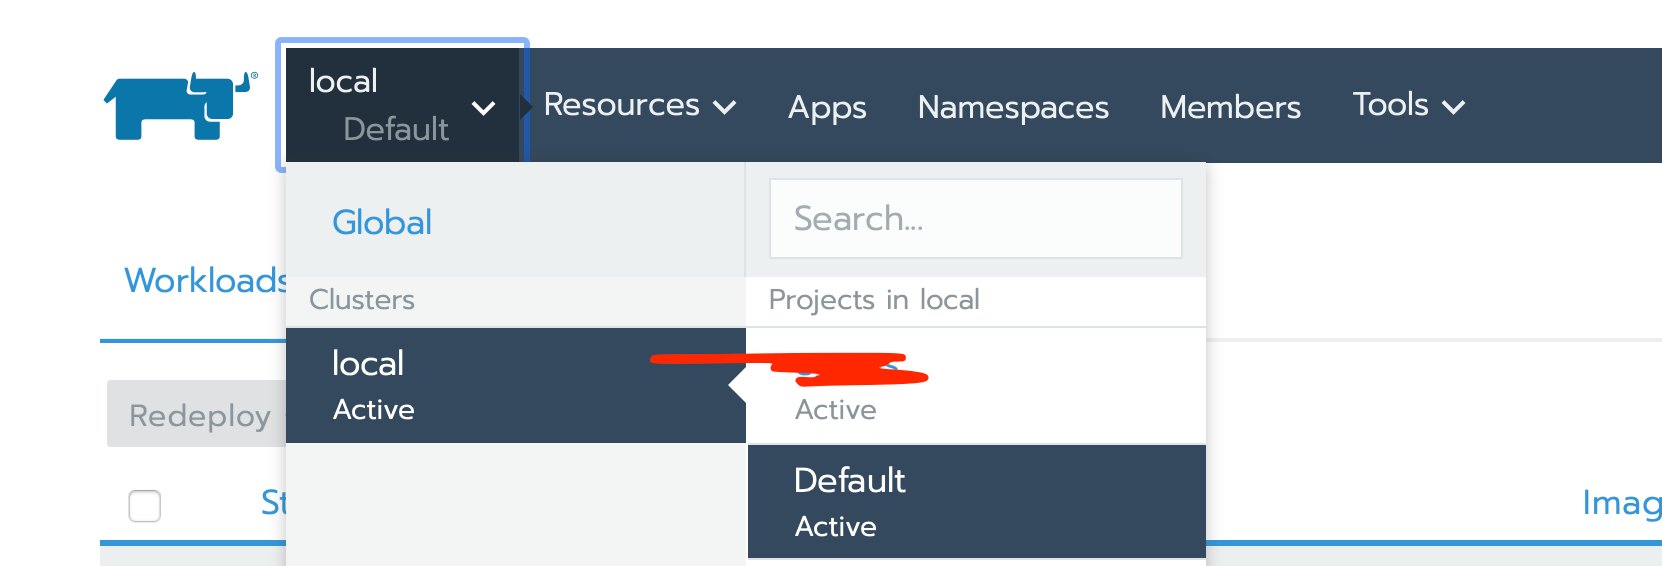
- go in local > cluster > default
- go in Apps > click on Launch
- search for mongodb-replicaset and click on it
- leave the default configuration, just set your AuthKey, Admin User and Admin password
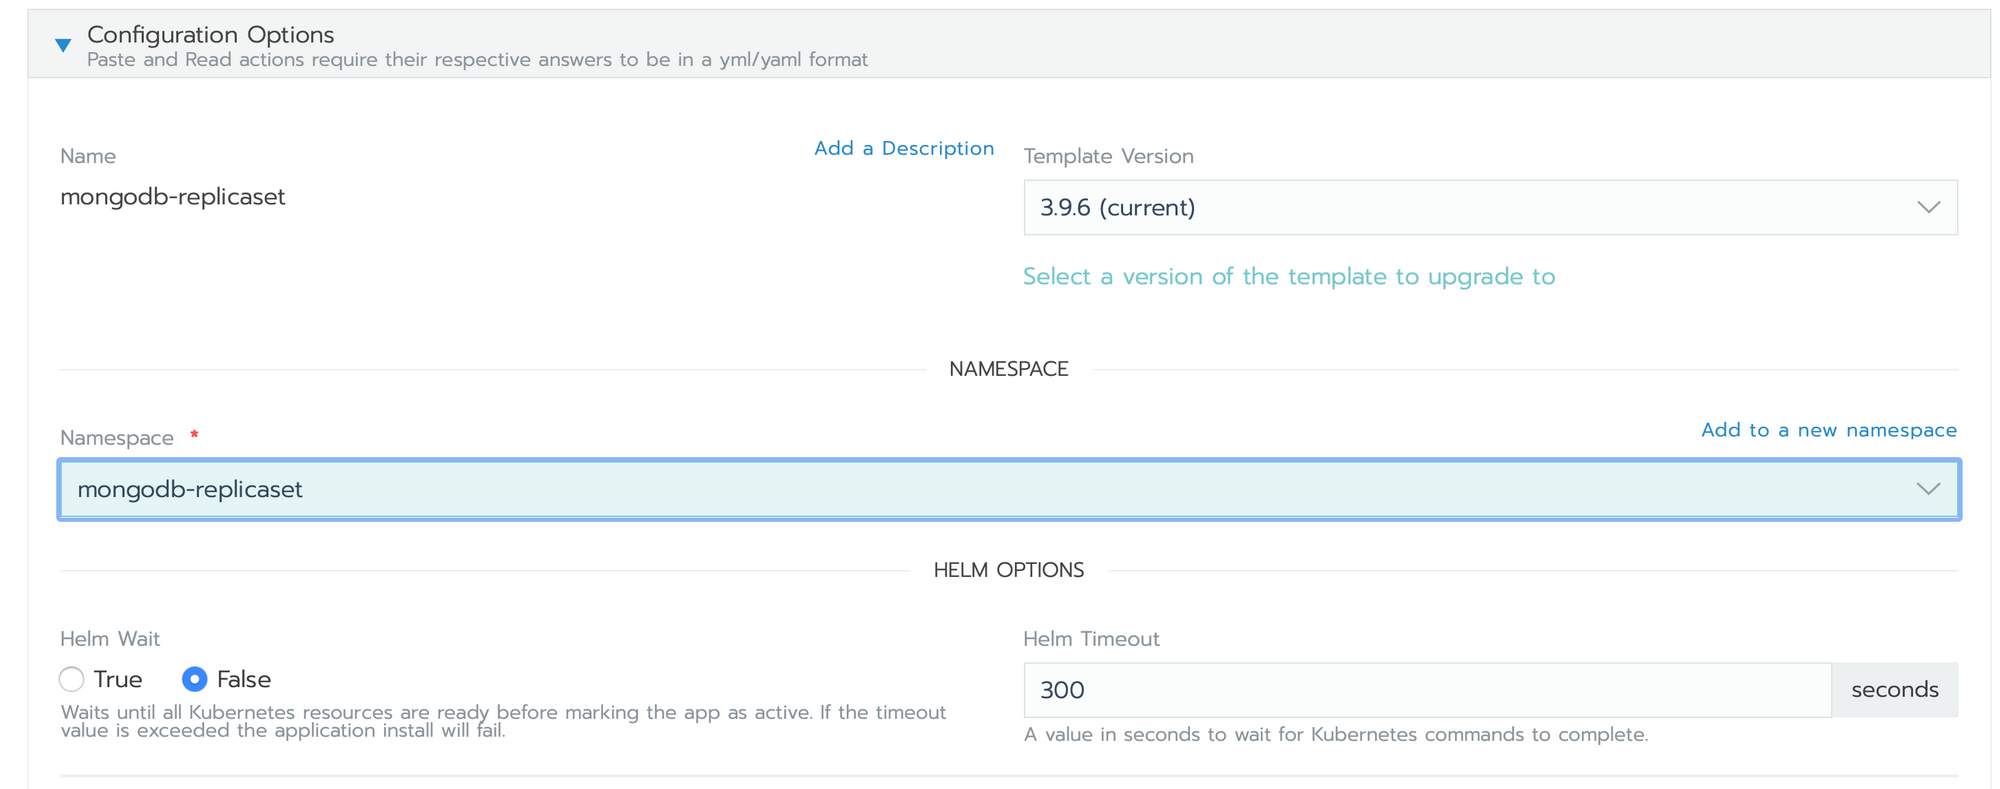
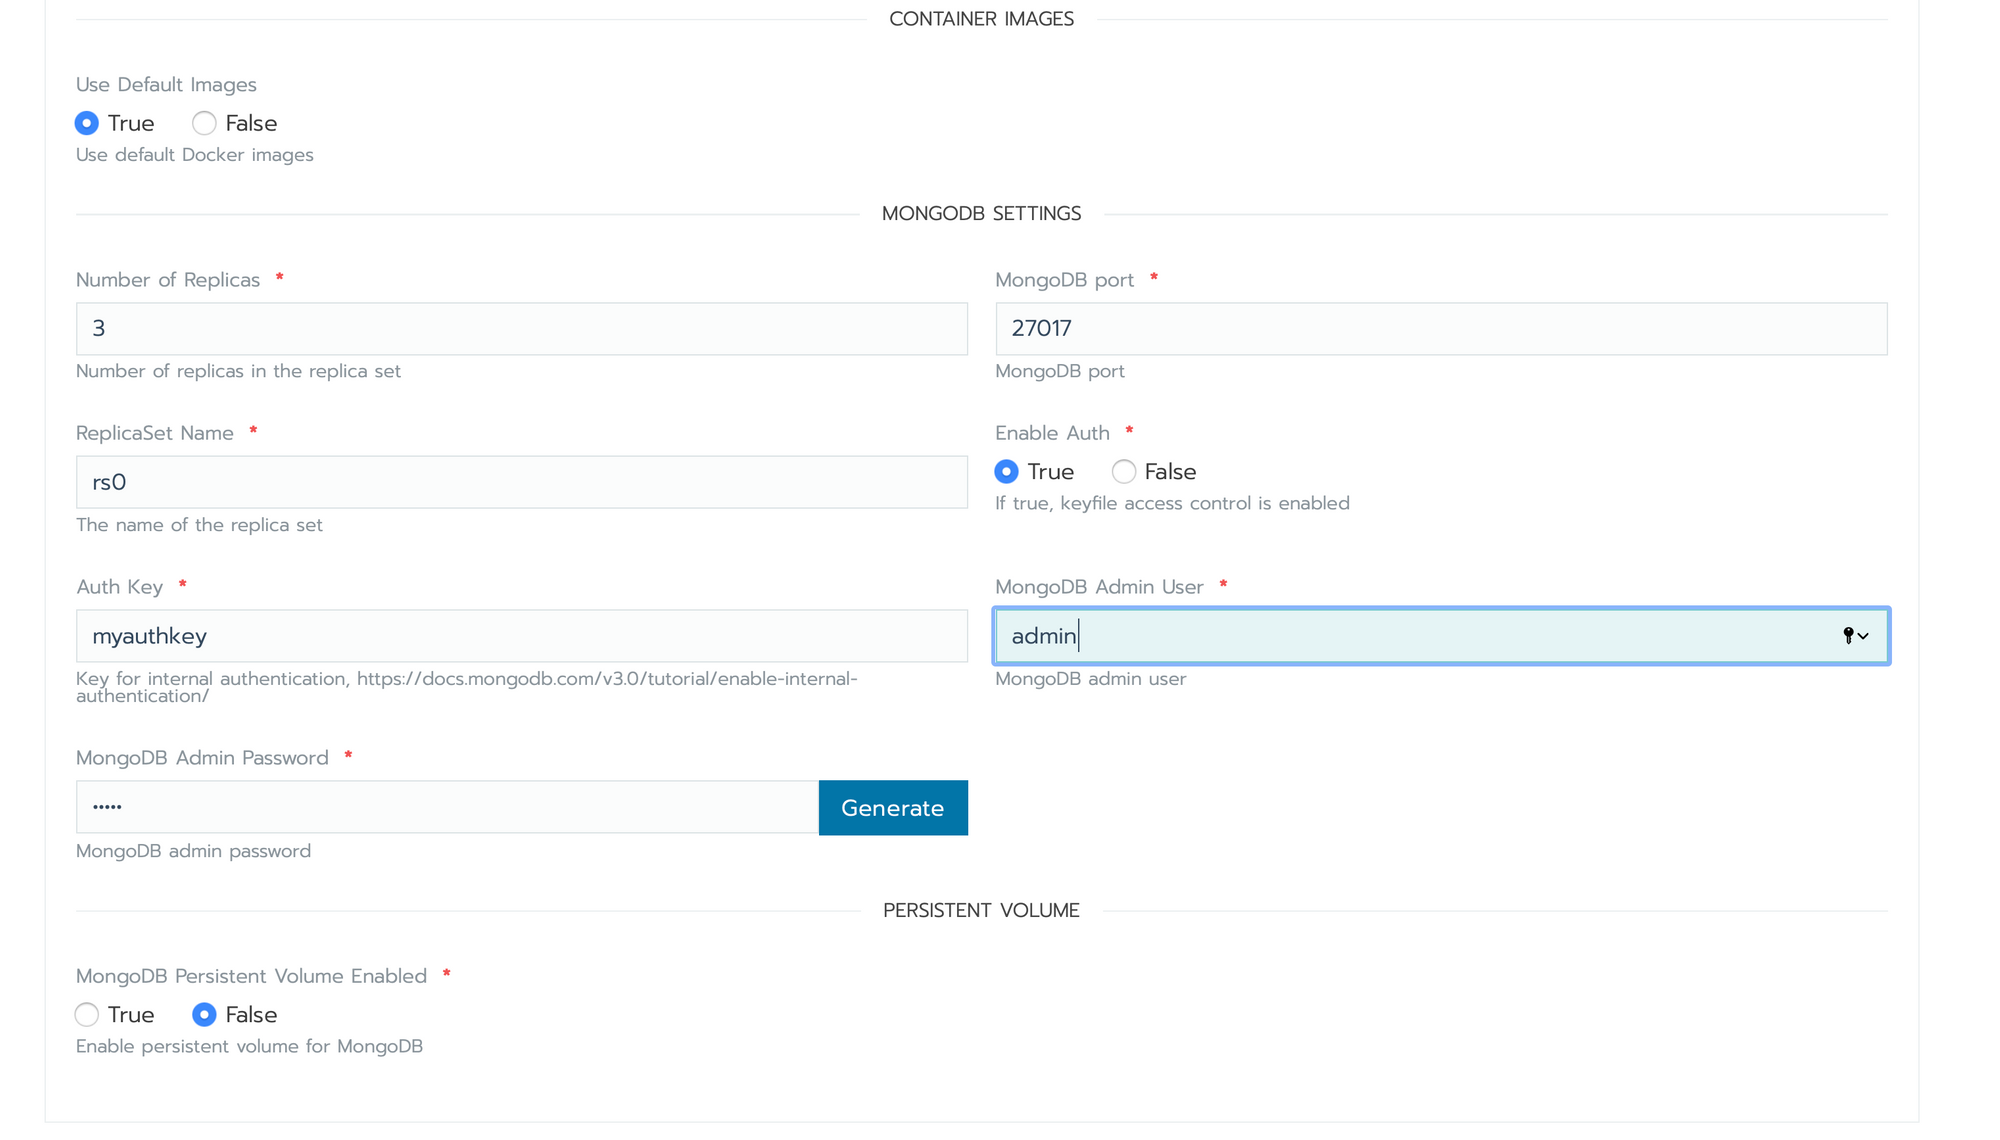
- Click on Launch
Mongo will be start in few minutes :)
Node
We will now define an A entry in your NDD redirected to the server, something like node.domain.com. We will now up node via rancher interface. Let's go :)
go in local > cluster > default
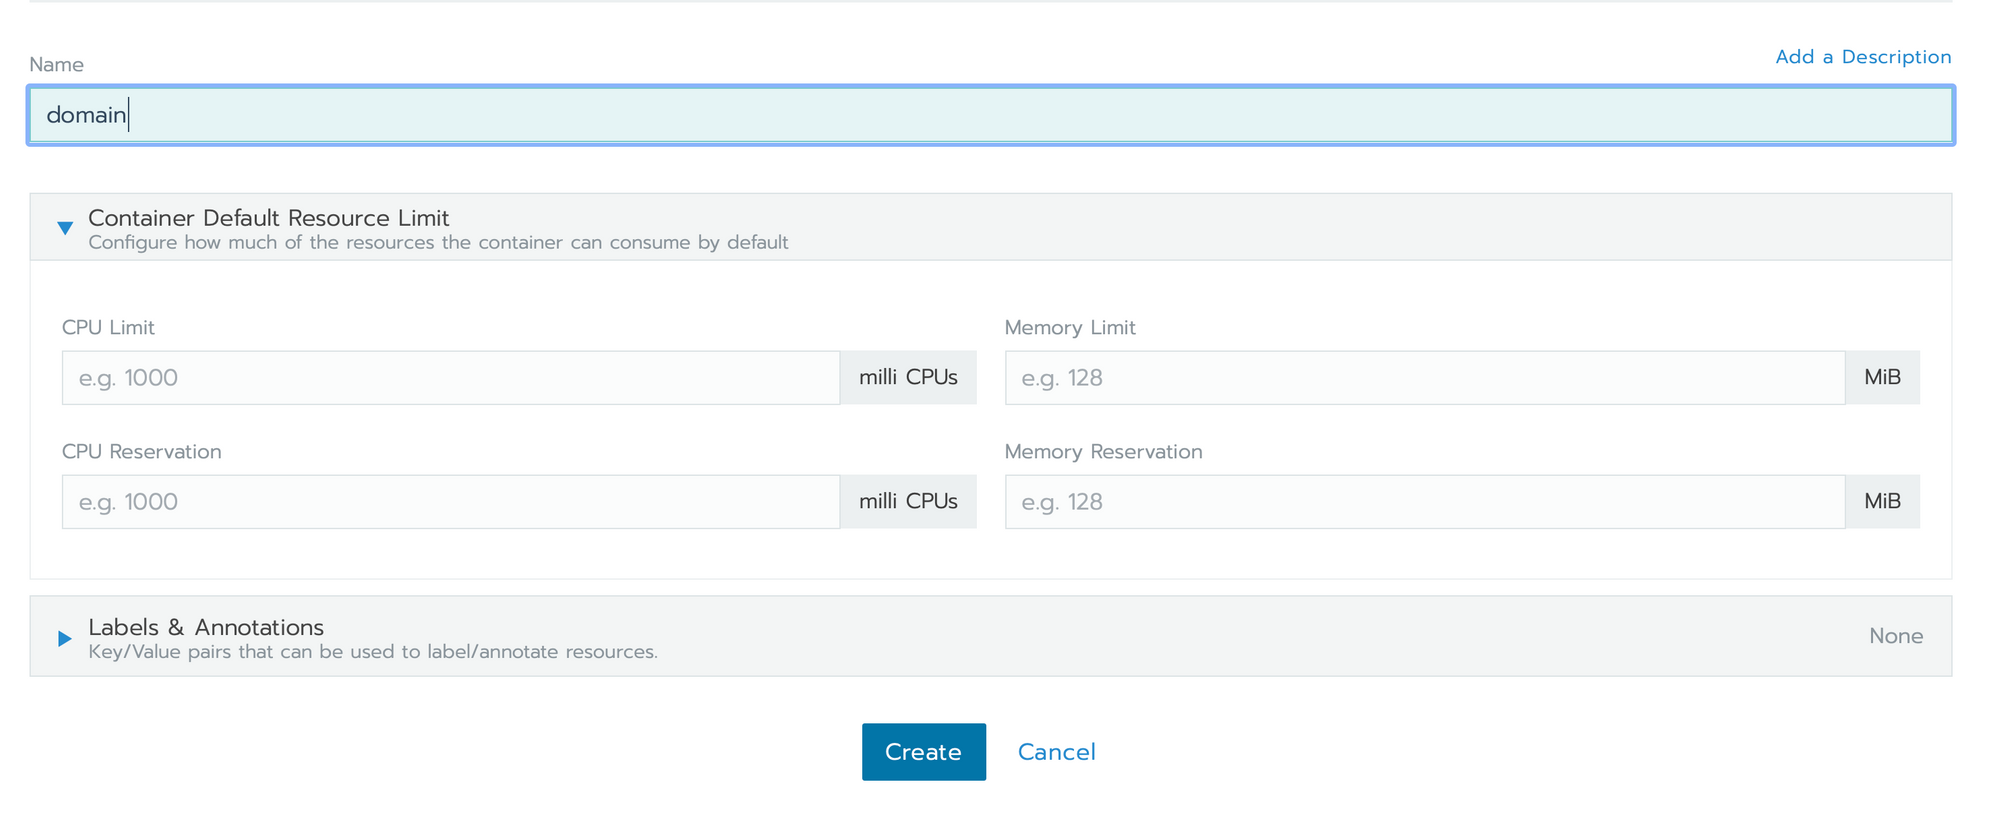
- click on Namespaces in top menu, then Add Namespace
- Set up Name and click on Create
- go in local > cluster > YourNameSpace
- click on Ressource > Worklaods > Deploy
Set the configuration :
name: node-domain-com
docker image: weareopensource/node:master
port name: nodeport
Publish the container port: 4200
Protocol: TCP
AS a: NodePort (On every node)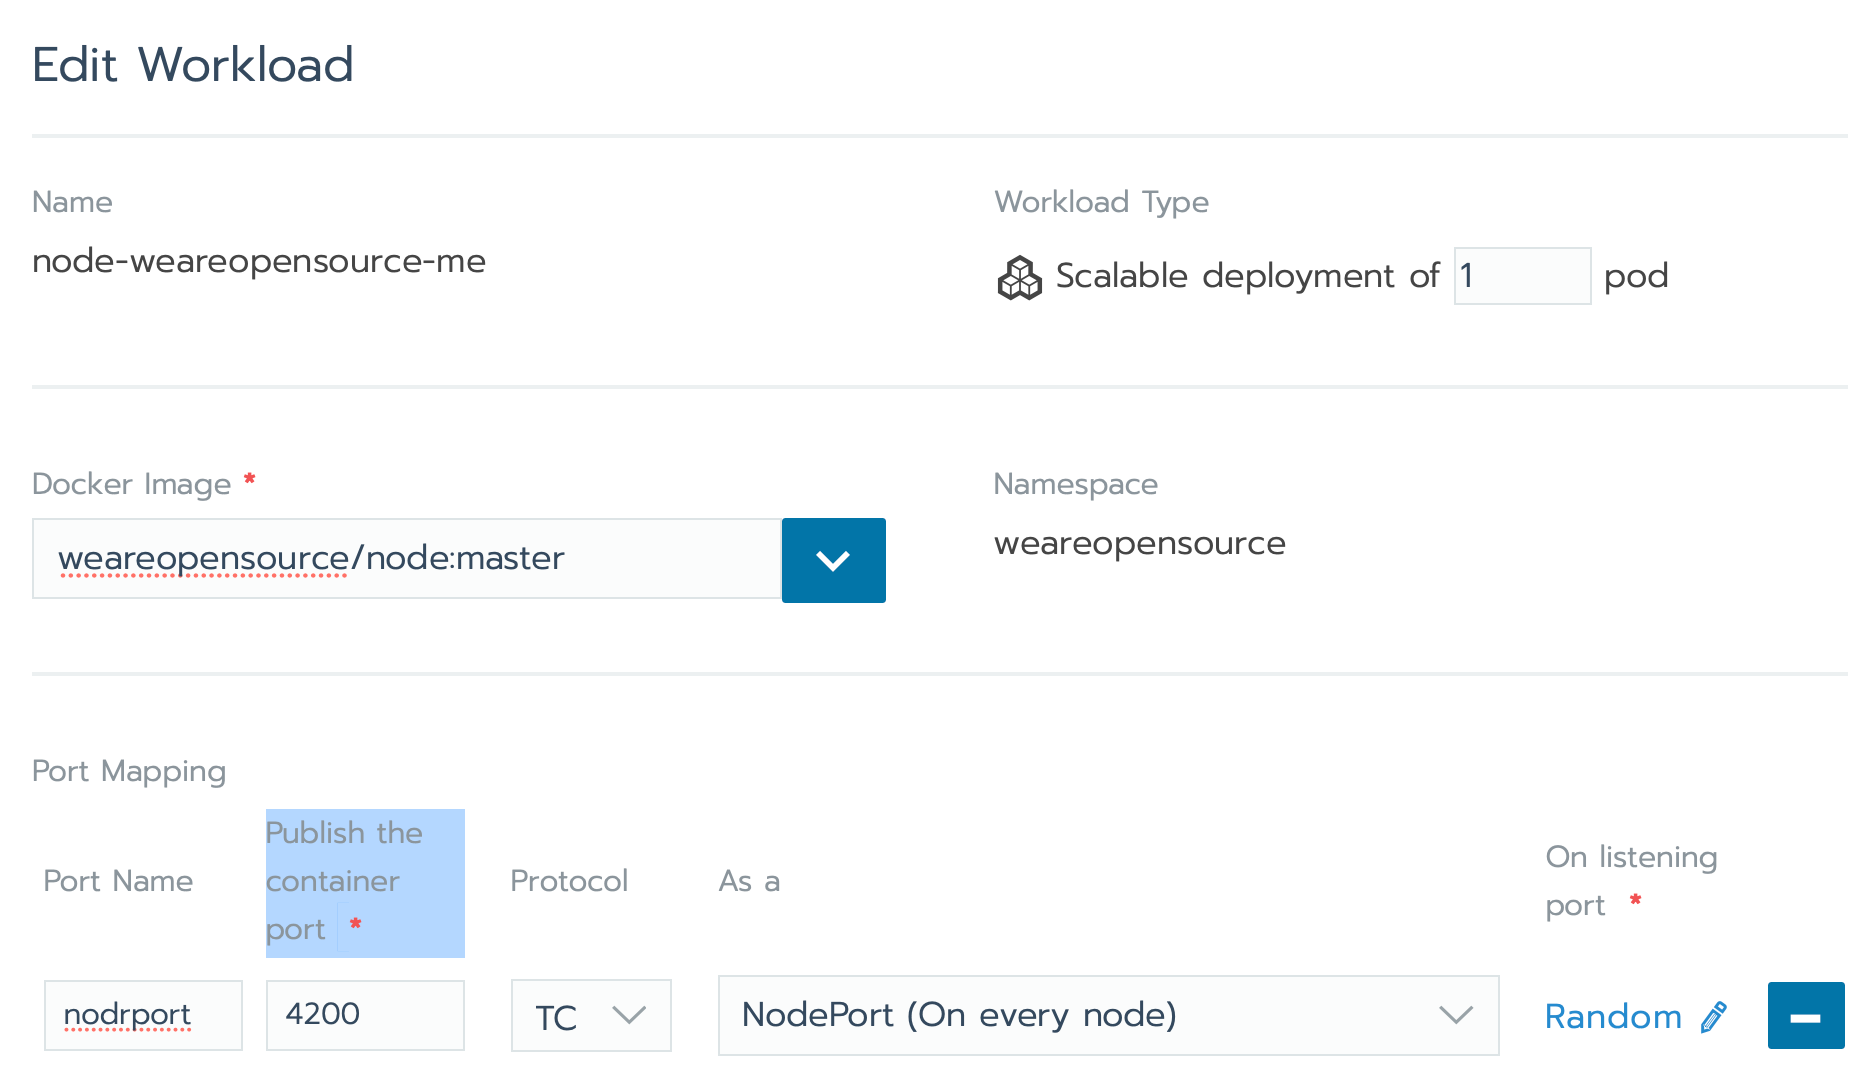
Environment Variables :
NODE_ENV: production
WAOS_NODE_cors_origin: ['https://vue.weareopensource.me']
WAOS_NODE_db_options_pass: password set for mongo
WAOS_NODE_db_options_user: admin
WAOS_NODE_db_uri: mongodb://mongodb-replicaset.mongodb-replicaset.svc.cluster.local:27017/?replicaSet=rs0
WAOS_NODE_host: 0.0.0.0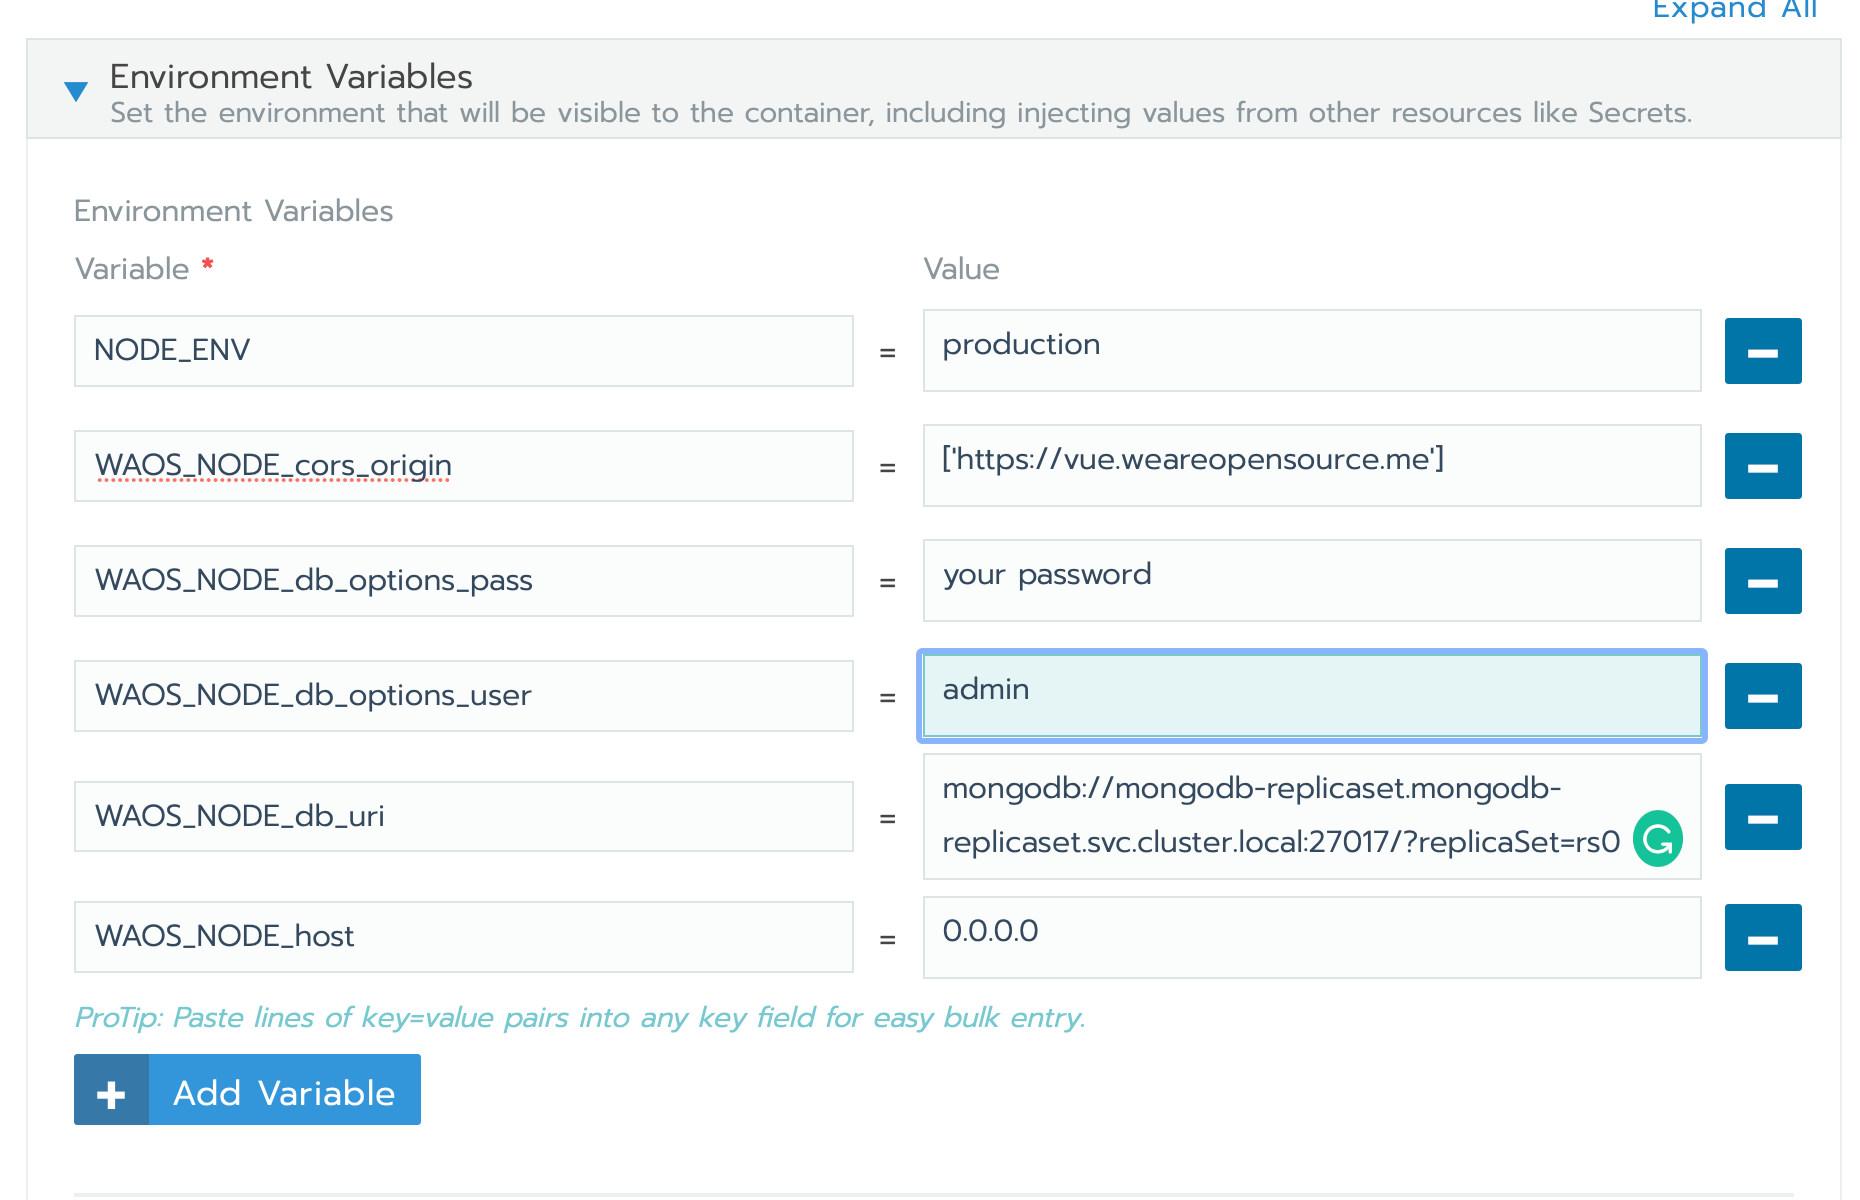
- Click on Save
Normally, if everything is ok, Node should be up quickly.

Will we now set ingress reverse proxy for our domain.
- go in local > cluster > YourNameSpace
- click on Ressource > Load Balancing > Add Ingress
Set the configuration :
name: node-domain-com
Namespace: YourNameSpace
Specify a hostname to use: node.domain.com
- remove default target Backend
- click on add Service
path: empty
target: node-domain-com # workload previously declared
port: nodeport
- click on Save

Normally you can now access to your service from your node.domain.com.
Vue
We will now define an A entry in your NDD redirected to the server, something like vue.domain.com.
The configuration of the front part will be quite close to the node part with a ready difference. Our Node docker accepts environment variables taken into account when running the image. For the Vue part, it's static files, so the docker image must be built for a specific environment, with variables. To do this, you cannot directly use the image we provide on docker-hub but must build your own which rancher will run. No breakdown docker hub is configured in 5 minutes.Fork our vue repository on github
- Create an account on docker-hub
- Click on create a Repository
- Select public for this example and connect to github (private requires additional configuration on the rancher side)
- Connect from github, and select your fork
- Add default build rule
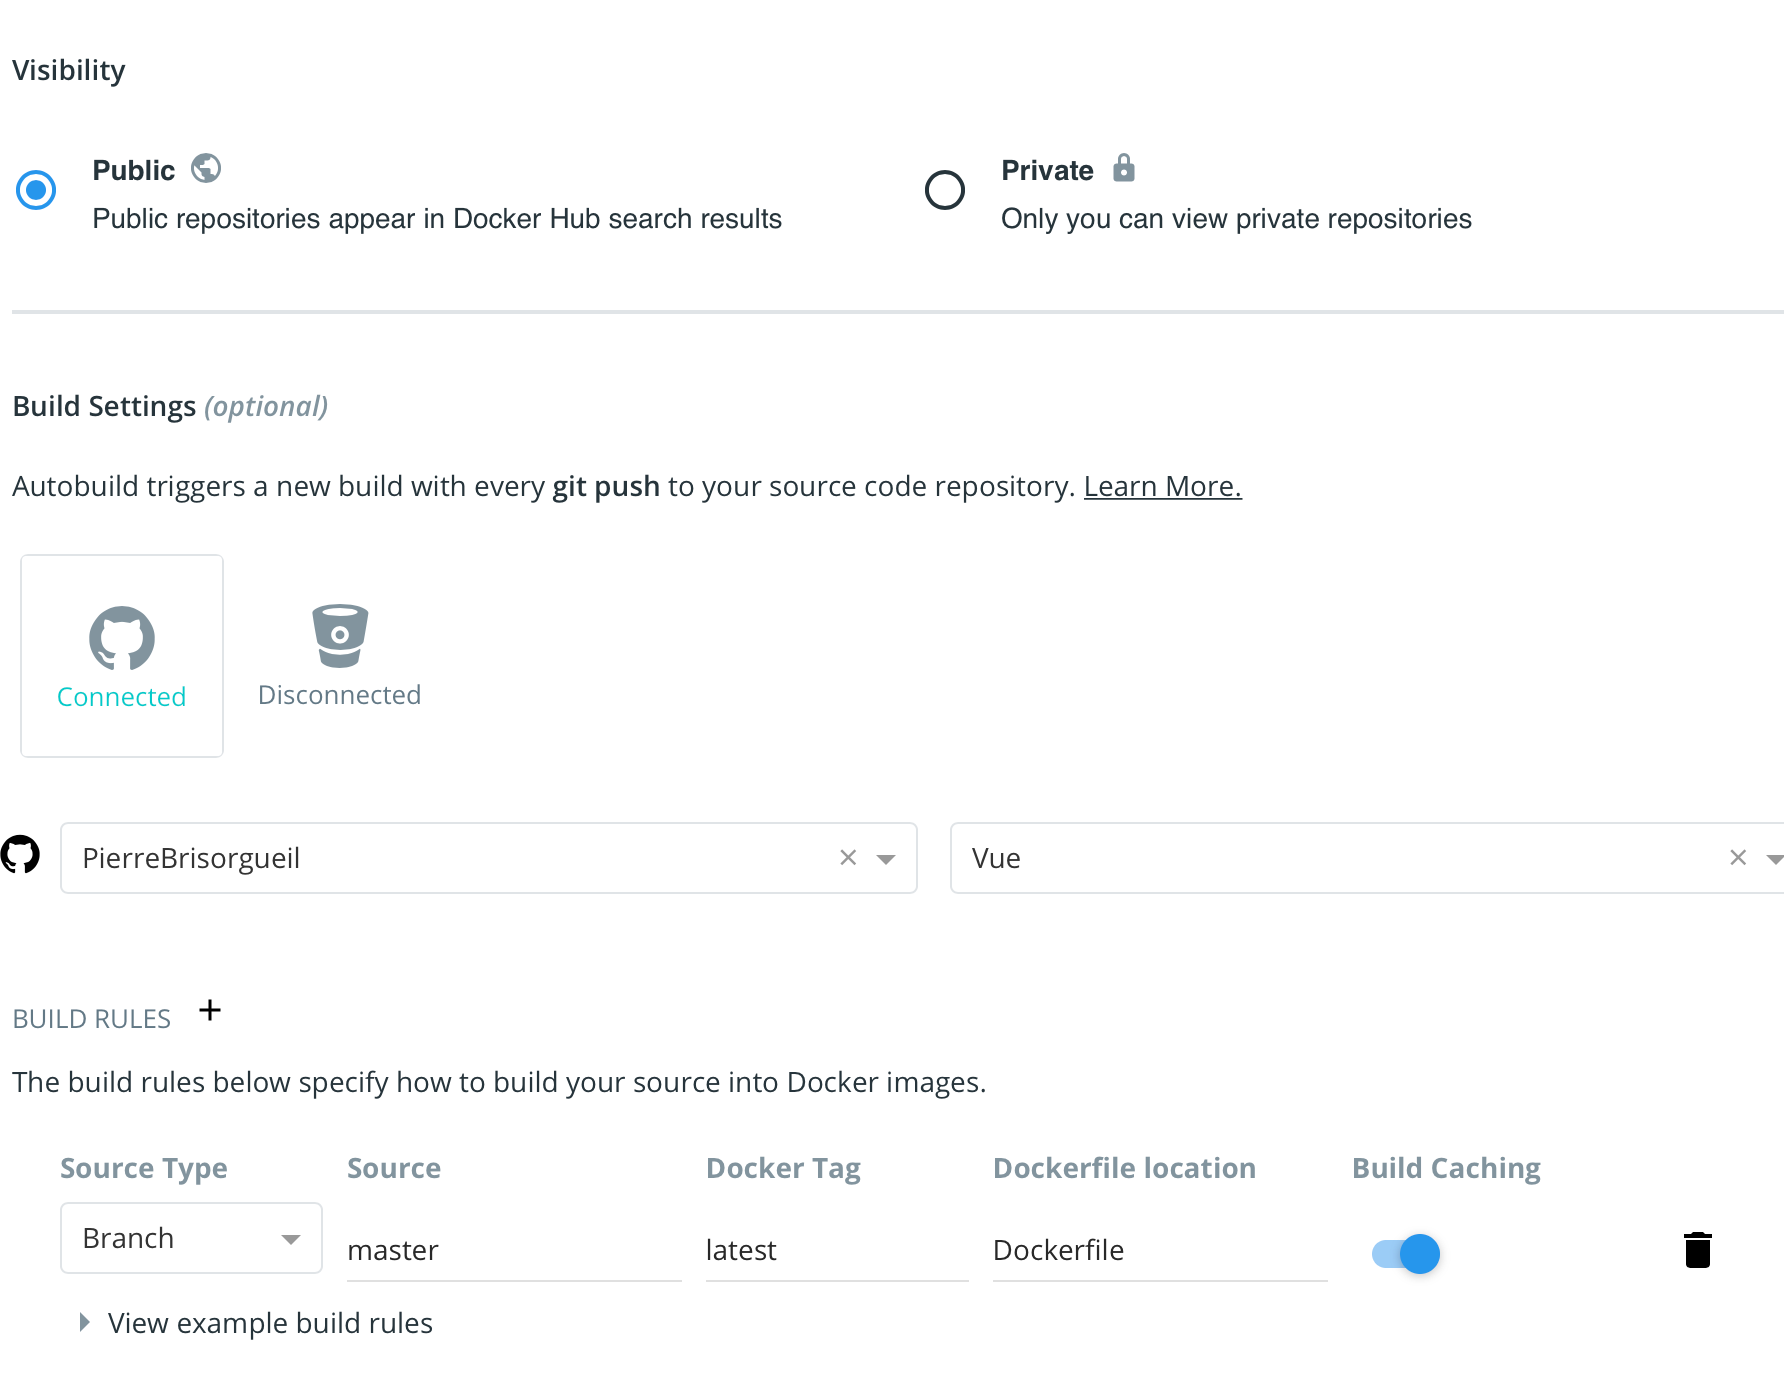
- Click on Create
We will now add required Args for your docker image. In the docker hub interface, you can only declare environment variables but we have added a hook in the repo allowing to execute them as argument of the build.
Add three Build Environment Variables
WAOS_VUE_api_host: node.domain.com
WAOS_VUE_api_port: a space to force no port set
WAOS_VUE_api_protocol: http- Click on Save and Build
Because of a depencie to Cypress with Vue the build can take 15-20 minutes, once finished you can deploy it via rancher.
- go in local > cluster > YourNameSpace
- click on Ressource > Worklaods > Deploy
Set the configuration :
name: vue-domain-com
docker image: yourgithub/yourvuefork:latest
port name: vueport
Publish the container port: 80
Protocol: TCP
AS a: NodePort (On every node)- Click on Save
Normally, if everything is ok, node should be up quickly.

Will we now set ingress reverse proxy for our domain.
- go in local > cluster > YourNameSpace
- click on Ressource > Load Balancing > Add Ingress
Set the configuration :
name: vue-domain-com
Namespace: YourNameSpace
Specify a hostname to use: vue.domain.com
- remove default target Backend
- click on add Service
- click on Save
path: empty
target: vue-domain-com # workload previously declared
port: vueport

Normally you can now access to your service from your vue.domain.com.
I hope to have helped you in future articles we will see how to add Let's Encrypt via ingress :)